In the era of high-speed internet, staying connected is more crucial than ever, especially in remote or rural locations, and Starlink is revolutionizing the game. This satellite internet service by SpaceX promises to deliver broadband speeds even in the most remote corners of the planet. If you're ready to say goodbye to buffering and hello to seamless streaming, you're in the right place.
Before diving into the installation process, let's unravel the technology behind Starlink and its global internet coverage. Starlink is a constellation of thousands of satellites orbiting the Earth, designed to provide low-latency, high-bandwidth internet to every corner of the globe. Unlike traditional satellite internet, Starlink's satellites are in low Earth orbit, which significantly reduces the delay in data transmission, ensuring a smoother online experience.
This guide will walk you through the Starlink installation process in 8 DIY steps, ensuring you can enjoy the perks of fast internet with a sense of personal accomplishment. So, let's get started!
Step 1: Pre-Installation Checklist
Gathering the Essentials for Your Starlink Installation
Every successful Starlink installation begins with a well-prepared checklist. Ensuring you have all the necessary tools and information before you start is crucial to a smooth and efficient setup process. Here's what you need to gather:
The Starlink Kit:
Your journey to a successful Starlink installation starts with the Starlink Kit itself. This package is your all-in-one gateway to high-speed internet, containing the satellite dish, a sturdy tripod for mounting, and a Wi-Fi router to connect your devices. Unpack each item and place them carefully in your workspace. Familiarize yourself with each component; knowing what each part does is a significant first step in the Starlink installation process. The "kit" does not include things like, an ethernet adapter or specific mounts.

Tools for Installation:
While the Starlink Kit includes the primary components, you'll need a few tools to secure everything in place. A reliable screwdriver, an electric drill with various bits, and a wrench set are the basics. Depending on your chosen location for the dish, you might also need a ladder to reach your roof or an elevated area. Safety first, though—ensure your ladder is stable, and you're comfortable working from heights.
Personal Safety Gear:
Safety should never be an afterthought during your Starlink installation. If you're planning to install the dish on your roof or another high place, a hard hat, safety glasses, and gloves can protect you from any unforeseen accidents. Also, consider a safety harness if you're going to be working on a steep incline.
Cable Management Supplies:
A successful Starlink installation isn't just about getting online; it's also about maintaining a tidy and hazard-free environment. Cable clips, conduits, or even weatherproof cable housing can protect and organize the wires running from your Starlink dish to the router and power supply. This not only keeps things looking neat but also prevents damage to the cables from environmental factors or general wear and tear.
Weather Consideration Tools:
Depending on your local climate, you might need additional tools for a weatherproof Starlink installation. This could include silicone sealant or waterproof tape to protect connection points, especially if you live in an area with frequent rain or snow.
Installation Manual and Support:
Lastly, keep the Starlink installation manual close at hand. This guide is your official source of information for each step of the installation process. Additionally, ensure you have access to Starlink customer support contact information in case you run into any issues.
By preparing with this comprehensive checklist, you're setting the stage for a successful Starlink installation. Remember, taking the time to gather your tools and understand the components is just as important as the physical installation itself. With everything in place, you're ready to move on to the next step: finding the perfect spot to set up your new Starlink service.

Step 2: Choosing the Perfect Spot
Finding the Ideal Location for Maximum Connectivity
The key to a flawless Starlink installation is selecting a spot with clear sky visibility. This step is critical because obstructions such as trees, buildings, and even small structures can significantly interfere with your signal. To ensure your Starlink installation delivers the high-speed internet connectivity it's renowned for, you must find an area with an unobstructed view of the sky.
Utilizing the Starlink App:
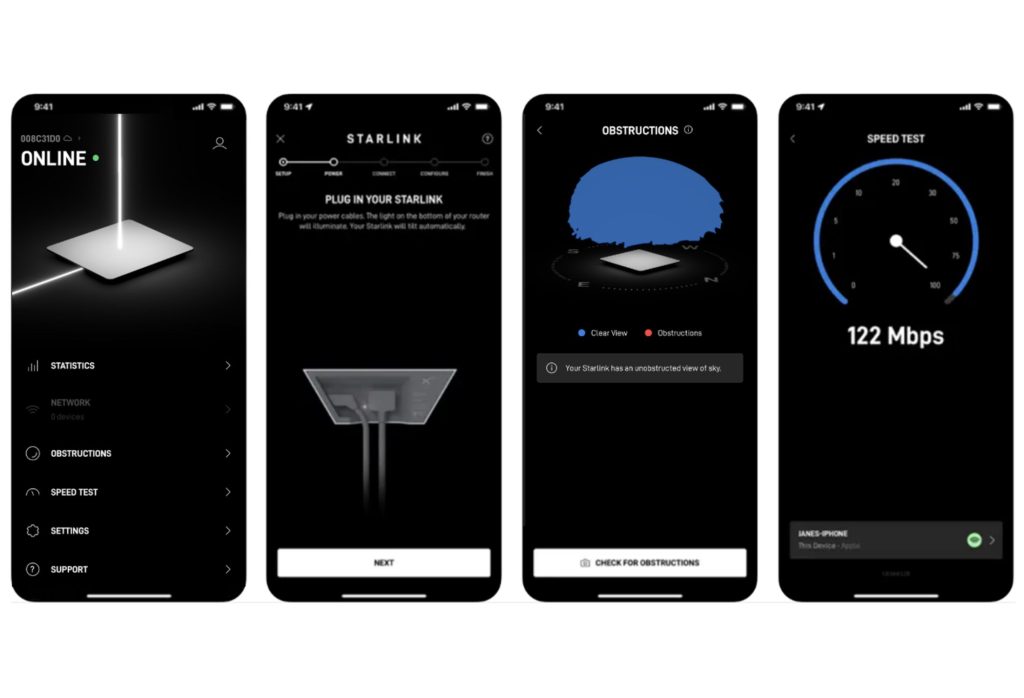
Starlink's dedicated app is an indispensable tool in this phase of the Starlink installation process. It's designed to help you identify the best location for your dish by using augmented reality to scan the sky. This feature visualizes the satellite paths and helps you pinpoint a spot where the dish will have a clear line of sight to them. Download the app on your smartphone or tablet, and use it to walk around your property to assess potential installation spots.
Considering the Path of Satellites:
Unlike traditional geostationary satellites, Starlink's constellation moves across the sky. This means that for a successful Starlink installation, you'll need to consider not just where the satellites are at one moment but where they will travel throughout the day and night. The Starlink app will assist you in understanding these paths, ensuring that the location you choose remains clear of obstructions as the satellites move.
Evaluating Your Environment:
When choosing the location for your Starlink installation, it's not just about what's directly above you. Take a moment to evaluate the entire environment. Are there tall trees that could grow over time and obstruct the view? Are there plans for new construction that could introduce new obstacles? Thinking ahead can save you from future signal issues.
Height Matters:
Sometimes, the best spot for your Starlink installation might be higher up. If you're in a densely wooded area or surrounded by tall buildings, mounting the dish on your roof or a high pole could provide a more unobstructed view of the sky. Ensure that any elevated position is safe and secure, and remember to follow local regulations regarding such installations.
 Avoiding Interference:
Keep in mind that other devices and structures can cause interference with your Starlink signal. For your Starlink installation, avoid areas near heavy machinery, large metal structures, or high-power cables. These can disrupt the delicate satellite signals and impact your internet quality.
Safety and Accessibility:
Lastly, while the priority for your Starlink installation is clear sky visibility, don't forget about safety and accessibility. The spot you choose should be safe to reach for both installation and any future maintenance. It should also be secure from theft or tampering, which could disrupt your service.
By carefully considering these factors, you'll ensure that your Starlink installation spot is optimized for the best possible connectivity. With the ideal location pinpointed, you're one step closer to enjoying the full benefits of Starlink's high-speed internet service.
Step 3: Unboxing and Understanding Components
Familiarize Yourself with the Starlink Kit
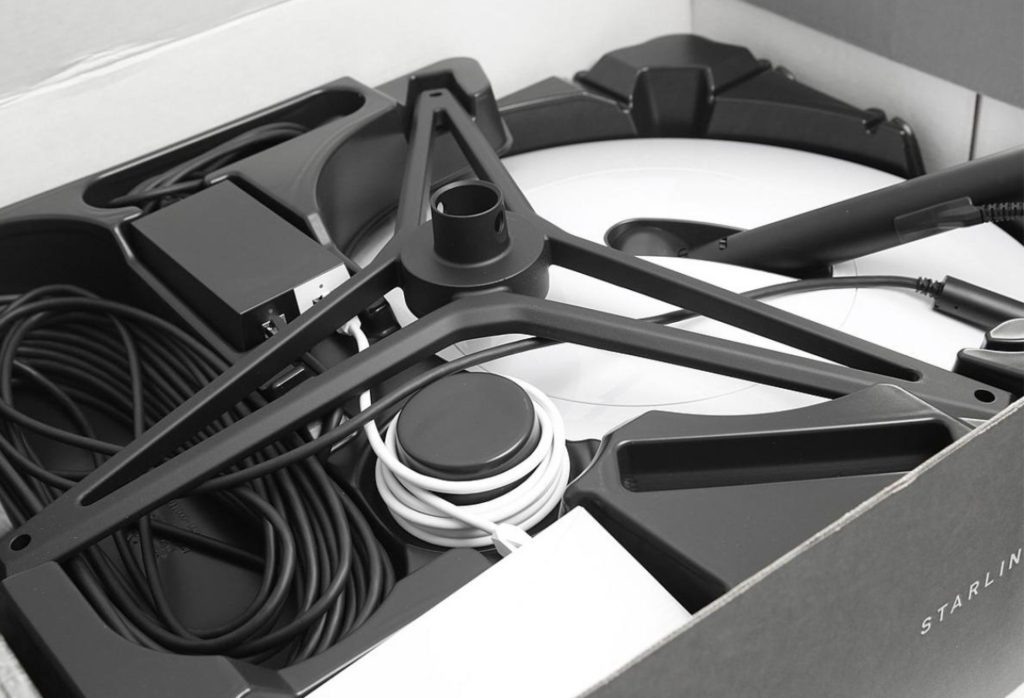
The moment you unbox your Starlink kit marks the beginning of an exciting journey towards global connectivity. This is where your Starlink installation adventure truly begins. As you open the box, you'll be greeted by several key components, each playing a vital role in connecting you to the vast expanse of the internet. Let's delve into what you'll find inside and get to know the purpose of each piece.

Satellite Dish:
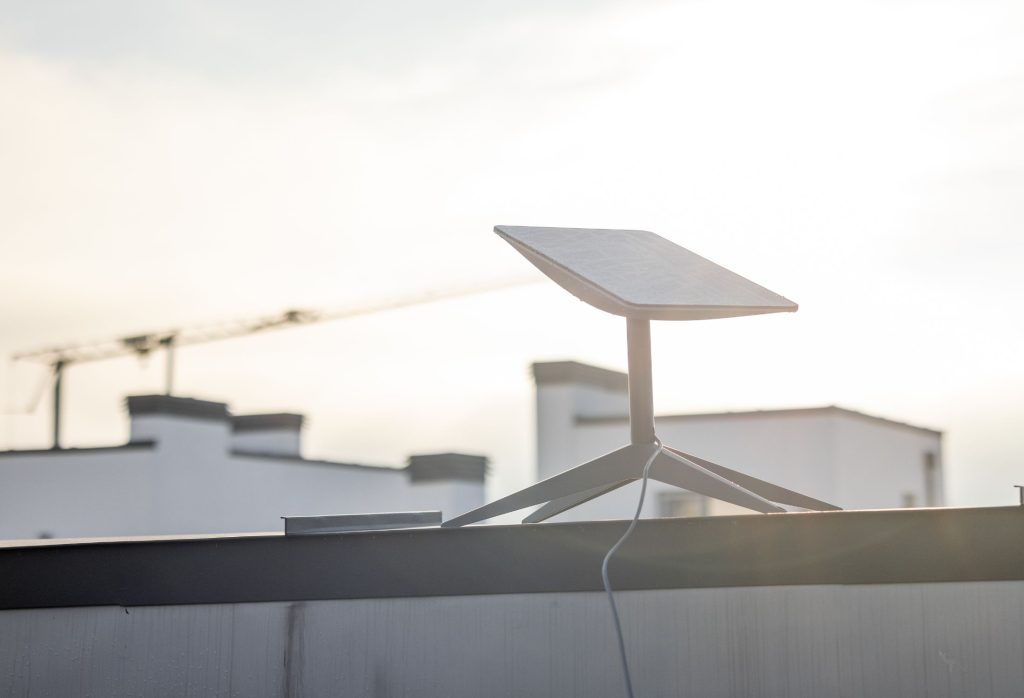
The centerpiece of your Starlink installation is the satellite dish. This is the primary receiver, designed to communicate with satellites whizzing overhead in low Earth orbit. It's engineered to automatically adjust its position to ensure optimal connectivity, making it a state-of-the-art piece of technology that's crucial for your Starlink installation.
Mounting Tripod:
The tripod is the foundation of your setup. It's robust and designed to support your dish in the correct orientation. During your Starlink installation, you'll attach 'Dishy' to this tripod, which can be positioned on the ground or secured to a more permanent fixture for stability.
Wi-Fi Router:
This device may seem familiar; it's similar to other routers but optimized for Starlink's network. The router will be the hub of your home's internet, connecting wirelessly to the dish and providing internet to all your devices. As part of the Starlink installation, you'll connect it to the dish using the provided cables and power it up to begin broadcasting your Wi-Fi signal.
Power Supply:
The power supply unit is what keeps your Starlink installation energized and functional. It's designed to handle the power needs of your dish and router, ensuring a steady and reliable energy flow. You'll connect this to your router and then to a power outlet, following the specific instructions provided to ensure safety and efficiency.
Cables:
The cables are the lifelines of your Starlink installation, transmitting power and data between the dish, router, and power supply. They are tailored to handle outdoor conditions if necessary, and it's important to lay them out thoughtfully to avoid damage and maintain the aesthetics of your property.
Getting Acquainted with Each Component:
As you unpack each item, take the time to understand its function. A successful Starlink installation is about more than just following steps; it's about knowing how each part contributes to the whole system. This knowledge will empower you to troubleshoot should any issues arise in the future.
Preparation for Installation:
Once you're familiar with all the components, you're ready to proceed. Ensure you have a clear workspace and all the necessary tools at hand. Remember, a well-organized Starlink installation process is a smoother one, so take the time to prepare your environment before moving on to the next step.
By thoroughly familiarizing yourself with the Starlink kit, you're ensuring that your Starlink installation will go as smoothly as possible. With each component ready and understood, you're set to move forward with confidence, one step closer to unlocking the full potential of your new high-speed internet connection.
Step 4: Mounting the Starlink Dish
Securely Installing the Dish for Optimal Signal Reception
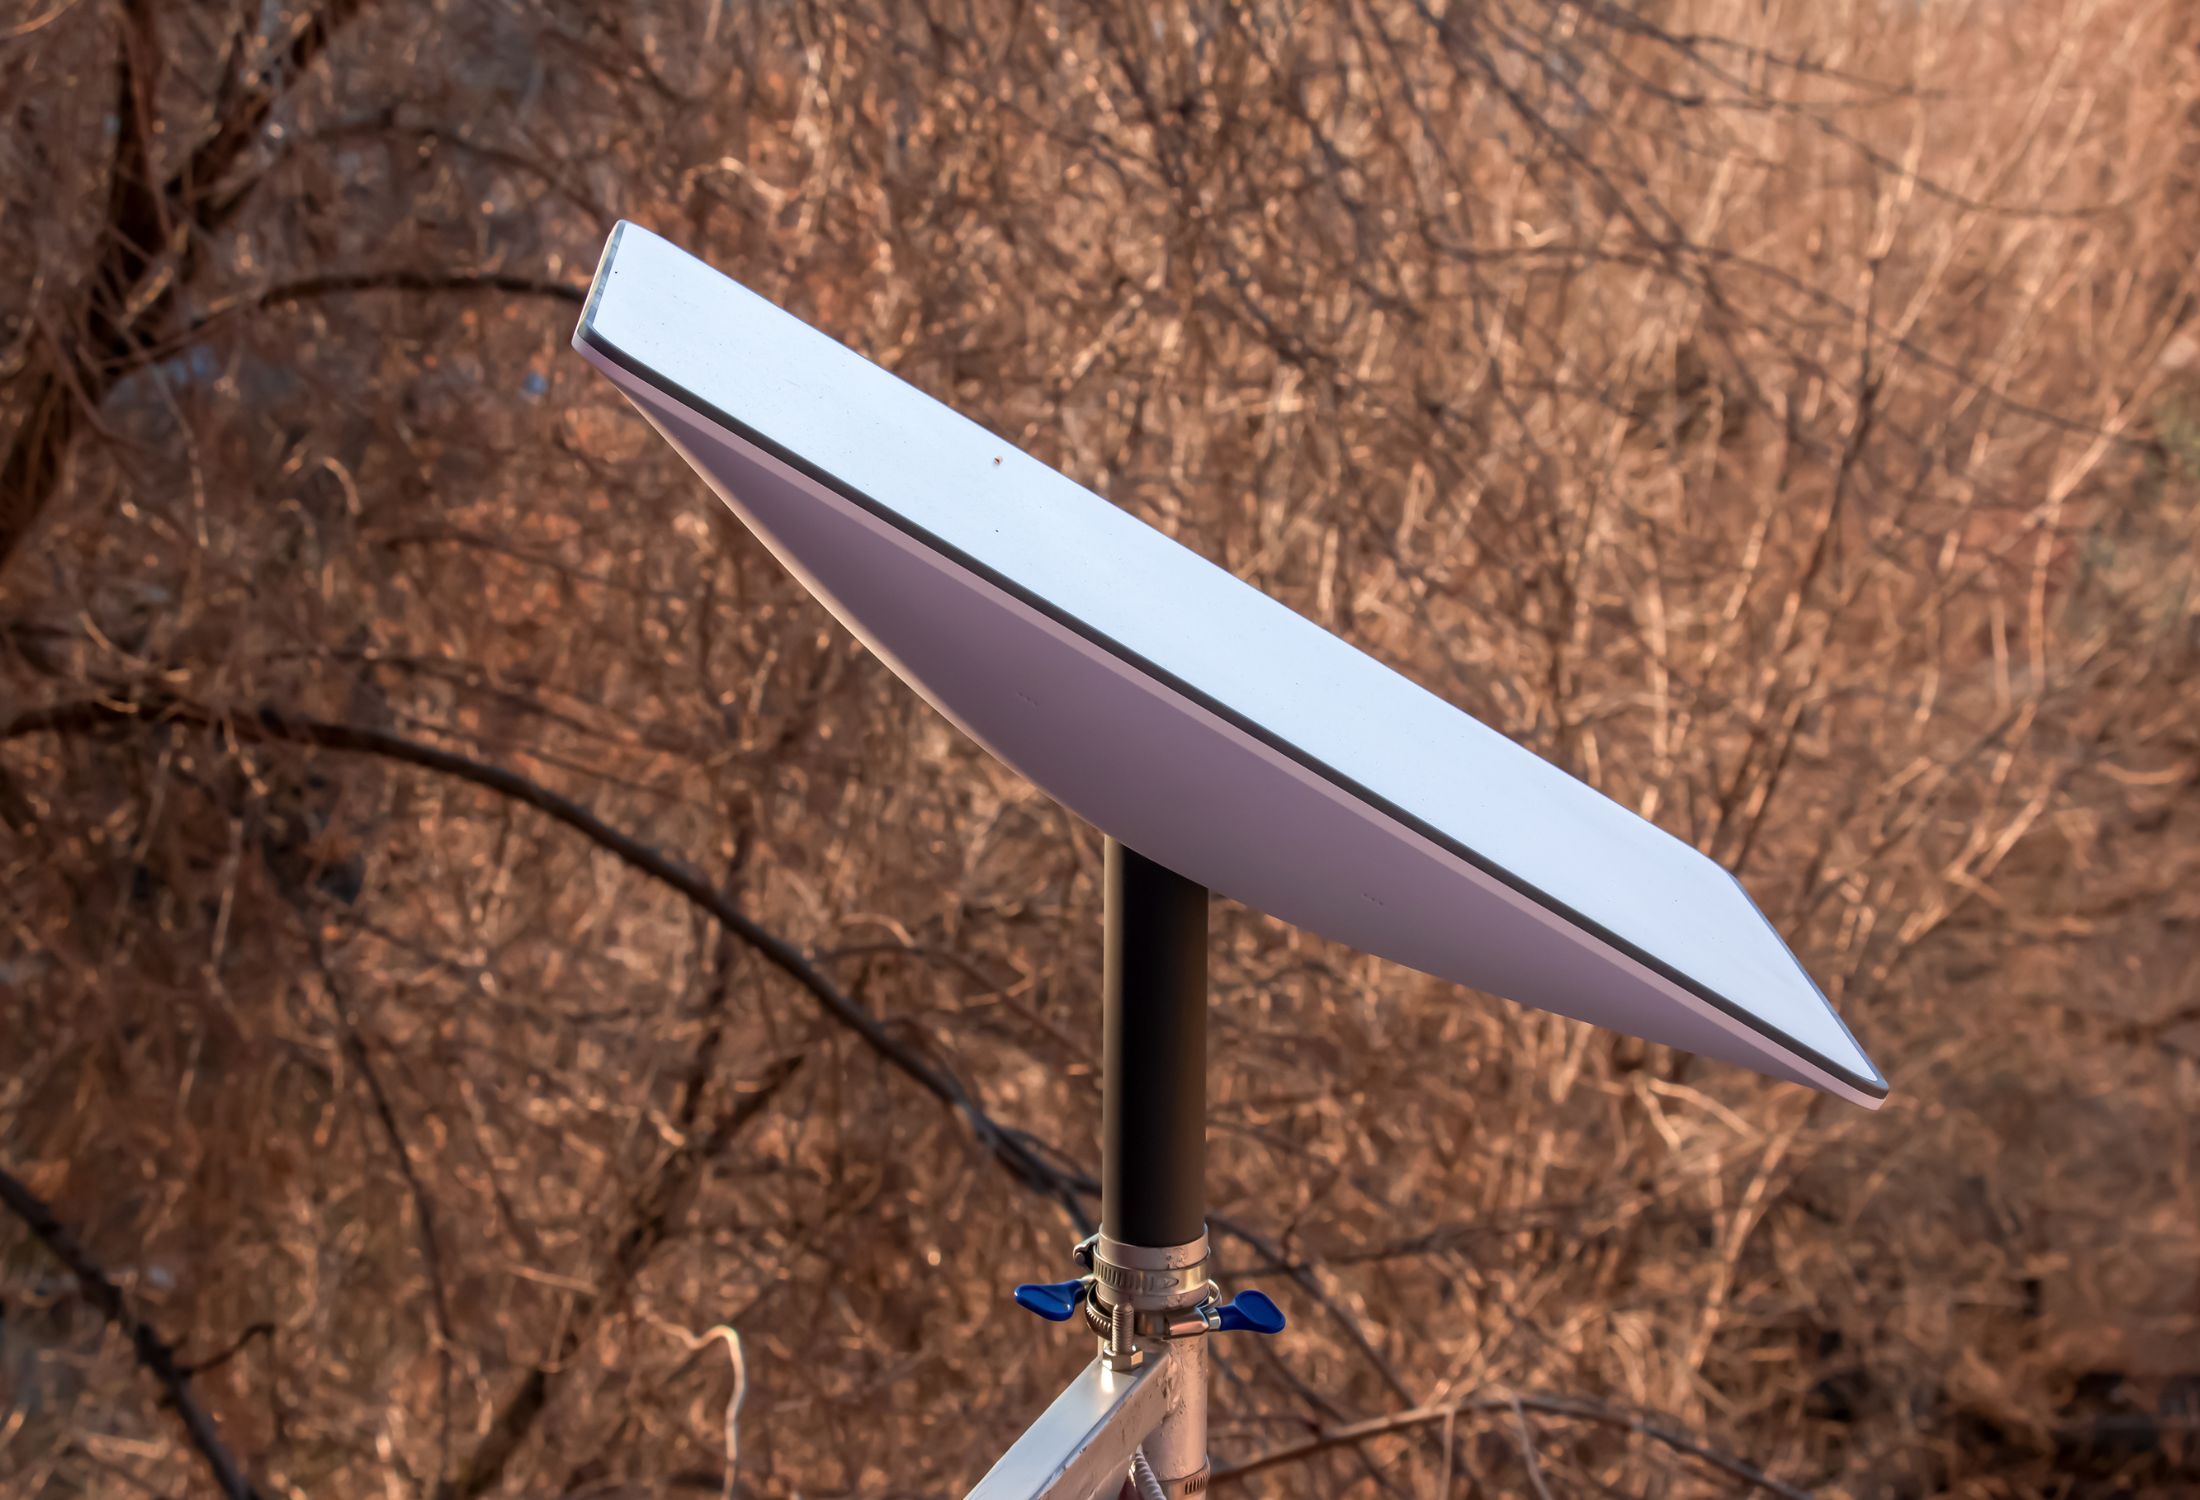
Mounting your Starlink dish is a pivotal moment in the Starlink installation process. This step is not just about placing a piece of equipment; it's about ensuring the heart of your Starlink installation is set up to tap into the cosmos, providing you with a gateway to the internet that's as vast as the sky above. Here's how to secure your connection to the stars.
Choosing a Stable Surface:
The first order of business in your Starlink installation is to select a stable and level surface for the tripod. This could be on the ground, on a flat section of your roof, or atop a dedicated pole. The goal is to find a spot that's not only stable but also free from vibrations and movements that could disrupt your connection.

Leveling the Tripod:
Once you've chosen the ideal location for your Starlink installation, it's time to level the tripod. A level tripod is essential for maintaining the correct orientation of the dish. Use a spirit level to adjust the legs of the tripod until you're confident it's perfectly horizontal. This attention to detail will pay dividends in signal quality.
Securing the Tripod:
With the tripod in position, it's time to secure it. If you're mounting it on the ground, use the provided stakes or weights. For a rooftop Starlink installation, you may need to use additional brackets or mounting hardware to ensure it's anchored securely, especially in areas prone to high winds or extreme weather.
Attaching the Dish:
With the tripod in place, you're ready to attach the dish. Carefully lift the dish and align it with the mounting post on the tripod. Once aligned, use the provided bolts or screws to secure the dish. During this phase of the Starlink installation, it's crucial to ensure that the dish is firmly attached, eliminating any risk of it tipping or swaying.
Positioning for Signal Reception:
The final step in mounting your Starlink dish is to position it for the best signal reception. While the dish will automatically seek out the optimal signal, starting with a general northward orientation (in the Northern Hemisphere) can facilitate a quicker connection. Ensure there are no obstructions between the dish and the sky, such as tree branches or other objects that could block the line of sight to the satellites.
Fine-Tuning the Installation:
Once your dish is mounted and positioned, the Starlink app can help you fine-tune the placement. The app will guide you through any additional adjustments needed to maximize signal strength, ensuring your Starlink installation is optimized for the best possible internet performance.
By meticulously mounting your Starlink dish, you've laid the groundwork for a robust and reliable internet service. This step is essential in the Starlink installation process, setting the stage for you to connect, work, and play without worrying about the stability of your internet connection.
Step 5: Cable Management
Organizing and Protecting Your Starlink Cables
Once the satellite dish is securely in place, the next critical phase in your Starlink installation is managing the cables. Proper cable management is essential not only for the functionality of your Starlink service but also for maintaining a clean and safe environment. Here's how to ensure your cables are well-organized and protected.
Planning Your Cable Route:
Before you begin running cables, plan the route they will take from the dish to the power source and router. This planning step is crucial in the Starlink installation process to avoid unnecessary bends, stretching, or exposure to potential damage. Consider the shortest and most direct path that also allows for securing the cables against wind and weather.
Securing Cables:
With your route planned, use cable clips or conduits to secure the cables along the chosen path. During your Starlink installation, ensure that these clips or conduits are designed for outdoor use if the cables will be exposed to the elements. They should be robust enough to withstand the local weather conditions, from scorching sun to freezing snow.

Avoiding Hazards:
As you lay out the cables for your Starlink installation, it's vital to run them in a way that prevents tripping hazards. This is particularly important if the cables cross any walkways or common areas. Use cable covers or run the cables overhead to keep them out of harm's way.
Protecting from Damage:
The cables that come with your Starlink kit are built to last, but additional protection can extend their life and prevent signal loss due to damage. Consider adding protective sleeving or using conduits, especially in areas where the cables might come into contact with sharp edges or corners.
Maintaining Aesthetics:
A successful Starlink installation isn't just about functionality; it's also about keeping your home looking good. Take the time to neatly bundle any excess cable and paint conduits to match your home's exterior for a seamless look. This attention to detail will ensure your Starlink installation is not only efficient but also visually pleasing.
Regular Checks:
After your Starlink installation is complete, it's a good practice to check your cable management setup periodically. Look for any signs of wear and tear, and make sure that the cables remain securely fastened. This ongoing maintenance will ensure the longevity of your Starlink service.
By following these cable management tips, you'll ensure that your Starlink installation is safe, durable, and visually unobtrusive. Properly managed cables are key to a reliable and sustainable Starlink experience, keeping you connected to high-speed internet without any additional worries.
Step 6: Connecting to Power
Powering Up Your Starlink for the First Time
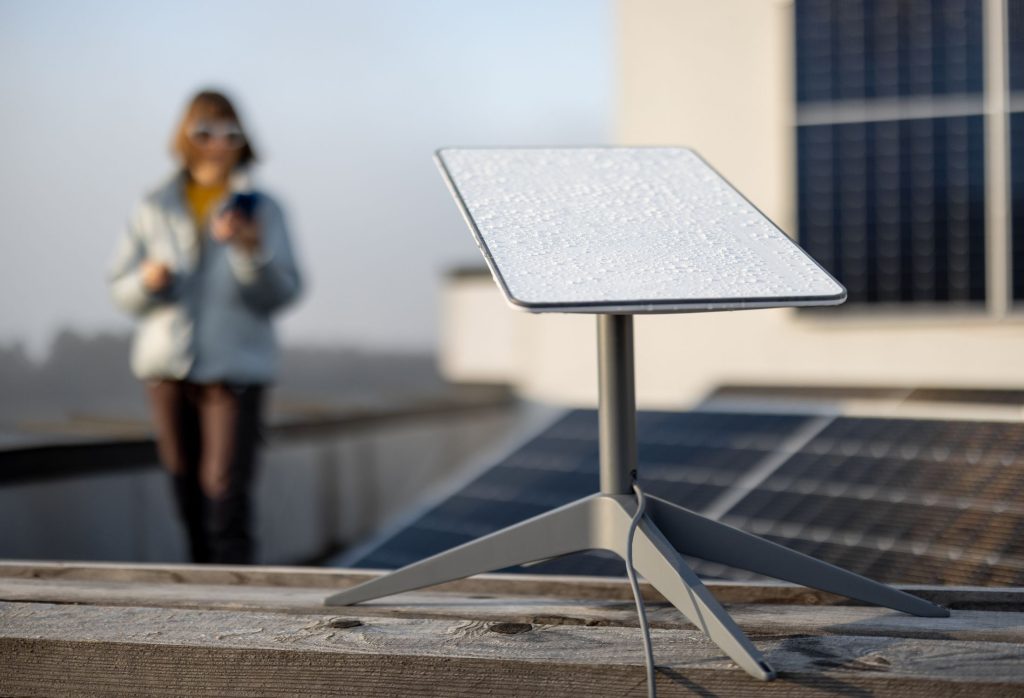
The moment has arrived in your Starlink installation process to infuse life into the system by connecting it to power. This step is more than just flipping a switch; it's about energizing the technology that will connect you to the rest of the world. Here's how to ensure your Starlink setup is powered correctly and ready to go.
Connecting the Cables:
Begin by taking the power cable and connecting it to the Wi-Fi router that came with your Starlink kit. This router is the hub of your Starlink installation, acting as the intermediary between the satellite dish and your devices. Ensure the connection is snug and secure, as a loose cable could result in intermittent connectivity.
Attaching to the Power Supply:
Next, take the other end of the power cable and plug it into the power supply unit. This is a crucial component in your Starlink installation, as it converts the electricity from your home into a form that the Starlink equipment can use without damage or disruption.
Routing to the Dish:
Now, it's time to connect the power supply to the satellite dish. The cable should be routed in the same careful manner you established during the cable management phase of your Starlink installation. This ensures that the power is delivered efficiently and safely to the dish.
Safety Check:
Before you power up your Starlink installation, perform a safety check. Ensure that all cables are properly insulated and that there's no risk of electrical hazards. Also, verify that the power supply is placed in a location where it's not exposed to moisture or extreme temperatures.
Switching On:
With everything connected, it's time to switch on the power. The Starlink equipment will begin its startup sequence. This is a critical juncture in your Starlink installation, where the system initializes and prepares to connect to the satellite network. The lights on the router and the dish will indicate the power status and help you confirm that everything is functioning as expected.
Startup Process:
Once powered, the Starlink system will automatically begin the startup process. This may take a few minutes as the system checks for updates and aligns with the satellite network. During this time, it's important not to disturb the dish or the router, as they are actively working to establish a stable connection.
Confirmation of Activation:
You'll know your Starlink installation has been successful when the router shows a stable connection light, and you can connect a device to the Wi-Fi network. This is your cue that the system is operational and ready to provide you with high-speed internet access.
By carefully connecting your Starlink system to power and ensuring all components are communicating correctly, you've completed a vital step in the Starlink installation process. Now, with the system powered up, you're on the brink of unlocking a new realm of internet possibilities.
Step 7: Initial Setup and Alignment
Aligning Your Starlink Dish for the Best Signal
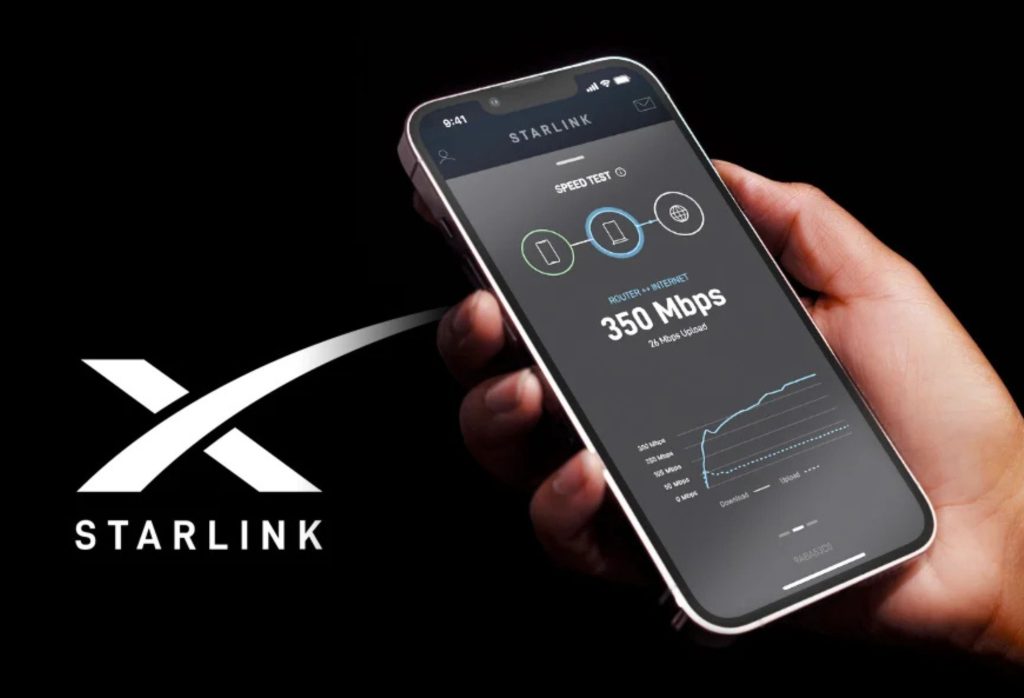
The alignment of your Starlink dish is a defining moment in the Starlink installation process. It's the fine-tuning that bridges the gap between a good connection and the best connection. With the Starlink app in hand, you're ready to adjust the dish to capture the clearest line of sight to the satellites above. Here's how to ensure your dish is perfectly aligned for an optimal internet experience.
Using the Starlink App:
The Starlink app is your personal guide through the alignment phase of your Starlink installation. It uses augmented reality to show you where the satellites are in the sky, helping you to avoid potential obstructions. Open the app and follow the instructions to begin the alignment process. The app will provide real-time feedback on the signal strength, which is essential for proper alignment.
Adjusting the Dish:
With feedback from the Starlink app, you'll make incremental adjustments to the dish's position. This might involve tilting it slightly or rotating it to hone in on the strongest signal. During your Starlink installation, patience is key; small movements can make a big difference in signal reception.
Securing the Best Signal:
As you adjust the dish, the Starlink app will indicate when you've found the strongest signal. At this point in your Starlink installation, it's important to tighten any adjustment knobs or bolts to secure the dish in this position. This ensures that the dish won't shift due to wind or other environmental factors, which could disrupt your connection.
Testing the Connection:
Once the app confirms that you have the best possible signal, it's time to test the connection. Connect a device to the Wi-Fi network and try streaming a video or downloading a file. A stable and fast connection is a good indicator that your Starlink installation has been successful.
Fine-Tuning Over Time:
It's worth noting that the initial setup isn't always the end of the alignment process. As you use your Starlink service, you might find that further adjustments are needed to maintain the best signal. The Starlink app will continue to be a valuable tool for these adjustments, ensuring that your Starlink installation remains at peak performance.
Professional Help if Needed:
If you encounter difficulties in aligning your dish for a strong signal, don't hesitate to reach out for professional assistance. The Starlink customer support team is available to help guide you through any challenges you may face during your Starlink installation.
By carefully aligning your Starlink dish with the help of the Starlink app, you've taken a significant step towards ensuring a reliable and high-quality internet connection. This careful alignment is a crucial component of the Starlink installation process, setting you up for a seamless online experience.
Step 8: Connecting to the Internet
Final Steps to Access the World Wide Web
The culmination of your Starlink installation is at hand, and you're on the brink of accessing the vast expanse of the internet. With the dish aligned and the hardware in place, the final steps are straightforward but thrilling. Here's how to bridge the last mile of your Starlink installation and dive into the digital universe.
Activating the Connection:
Once the dish is aligned for optimal signal reception, your Starlink system is ready to reach out to the satellites that dot the sky. The router, now connected and powered, will initiate communication with the constellation of satellites, establishing your link to the internet. This is a pivotal moment in your Starlink installation, as it signifies the transition from setup to live service.

Setting Up Wi-Fi:
With the satellite connection active, the next step in your Starlink installation is to set up your Wi-Fi network. The Starlink app will guide you through this process, which involves selecting a network name (SSID) and a strong password. This ensures that your connection is secure and that only authorized users can access your Wi-Fi.
Testing Your Connection:
After setting up your network, test your connection as part of your Starlink installation. Connect a device to your new Wi-Fi network and navigate to a website or stream a video. This initial test will give you a sense of the speed and stability of your Starlink internet service.
Registering Your Starlink Account:
To manage your service and receive support, you'll need to register your Starlink account if you haven't already done so. This can be done through the Starlink app or the Starlink website. Completing this step is essential for a full-fledged Starlink installation, as it gives you access to customer service, billing information, and system updates.
Exploring the Features:
Take some time to explore the features available through your Starlink service. The app offers detailed insights into your system's performance, including signal strength, data usage, and more. Familiarizing yourself with these features is a valuable part of your Starlink installation, empowering you to make the most of your new high-speed internet.
Enjoying the Benefits:
With the technical steps of your Starlink installation complete, it's time to enjoy the benefits. Whether it's streaming high-definition movies, participating in video conferences, or playing online games, your Starlink service is equipped to handle it all with ease.
By following these final steps, your Starlink installation is now complete, and the World Wide Web is at your fingertips. You've successfully navigated the setup process and can now revel in the capabilities of your new, high-speed satellite internet connection.
Bonus: RV and Mobile Solutions
Taking Your Starlink on the Road
For those who dream of hitting the road without losing the thread of connectivity, Starlink's RV and mobile solutions are a game-changer. Whether you're living the RV life or need a mobile setup, understanding how to adapt your Starlink installation for life on the move is key. Here's how to keep your Starlink internet humming, no matter where your travels take you.

Understanding Mobile Compatibility:
First, it's important to note that Starlink offers options specifically designed for mobile use. This means that your Starlink installation can be adapted to work with RVs, boats, and other vehicles. However, it's crucial to check the latest updates from Starlink regarding mobile service availability and any specific equipment that may be required.
Choosing the Right Equipment:
For a mobile Starlink installation, you'll need a portable mount and possibly a more ruggedized version of the standard setup to withstand the rigors of travel. Starlink's user-friendly design allows for quick disassembly and reassembly, making it ideal for those who are constantly on the move.
Powering Your Mobile Setup:
Powering your Starlink installation in a mobile environment requires planning. You'll need a reliable power source, such as an RV battery system, generator, or solar panels. Ensure that your 12v power setup can handle the demands of the Starlink equipment to maintain a stable internet connection.

Securing the Dish During Travel:
When it's time to hit the road, securing the satellite dish is crucial. The dish should be stowed safely to prevent damage during transit. Once you arrive at your destination, you can set up the dish in a location with a clear view of the sky, just as you would with a stationary Starlink installation.
Adjusting for Optimal Signal:
Each new location may require a fresh alignment to ensure the best signal reception. Use the Starlink app to recalibrate the dish's position at each stop. Remember, the key to a successful mobile Starlink installation is flexibility and the ability to adapt to new environments.
Staying Connected Everywhere:
With Starlink's RV and mobile solutions, the promise of reliable internet on the go is now a reality. Whether you're parked in a remote campsite or living off-grid, your Starlink installation can provide the connectivity you need to stay in touch, work remotely, or stream your favorite content.
By embracing the mobile solutions offered by Starlink, you're no longer tethered to a fixed location for high-speed internet. This section of your Starlink installation journey opens up a world of possibilities for adventure without sacrificing the comforts of connectivity.
A New Frontier in Internet Connectivity
Congratulations, you've successfully completed your Starlink installation; welcome to a new horizon of internet connectivity. This isn't just a routine setup; it's a leap into a future where high-speed internet is accessible even in the most remote corners of the planet. By following these steps, you've not only upgraded your internet service but also become a part of a community that's pioneering the way we connect across the globe, especially in rural areas! Interested in moving to a rural area? Read this article.
Reflecting on Your Starlink Installation Journey:
As you reflect on the process, from unboxing to powering up, consider the remarkable technology you've engaged with. Your Starlink installation is more than just a personal achievement; it's a contribution to a larger mission of bridging digital divides and opening up new possibilities for communication, education, and entertainment.
The Impact of Your Starlink Installation:
With your new Starlink service, you're not just a consumer of internet services; you're at the forefront of a technological revolution. The Starlink installation you've completed is a testament to your willingness to embrace new technologies and adapt to innovative ways of thinking about connectivity.
Embracing the Change:
As you embark on this journey with Starlink, you're equipped to explore the vast potential of the internet like never before. Whether it's for work, learning, or leisure, your Starlink installation has unlocked a portal to opportunities that traditional internet services could not provide, especially in areas where connectivity was once a challenge.
Sharing Your Experience:
Your Starlink installation story could inspire others to take the plunge into this new form of internet service. Share your experience, the challenges you faced, and the triumphs you celebrated. Your insights could be invaluable to the next person looking to embark on their own Starlink installation journey.
Looking to the Future:
With the completion of your Starlink installation, even if you're off-grid, you're now part of a global network that's constantly evolving. As Starlink expands and improves, you can look forward to even more enhancements and services that will continue to transform the way we connect with the world.
Final Thoughts:
Your successful Starlink installation is just the beginning. You've opened the door to a world of possibilities, and now it's time to explore them. So, go ahead and stream, browse, and connect to your heart's content, knowing that you're riding the wave of a revolutionary change in global internet connectivity.
Ready to take the first step? Let’s chat about finding your dream property in the Potomac Highlands and making your countryside vision a reality!
Share with
Frequently Asked Questions
You can check availability on the Starlink website by entering your address. Starlink announced on October 2, 2023, that its services are now available everywhere in the United States. Check the location map for more details.
Absolutely! Starlink is designed to be user-friendly and comes with a kit that includes all the necessary components for a DIY installation. The Starlink app provides guidance throughout the process, making it accessible for individuals to set up on their own.
Yes, a clear view of the northern sky is essential for Starlink to function correctly. Obstructions such as trees, buildings, or other significant barriers can interfere with the signal, so finding a location with minimal obstructions is crucial during installation.
Yes, with some potential caveats. Starlink can function in various weather conditions, including rain, snow, and cold temperatures. However, like all satellite-based services, severe weather can sometimes affect the signal quality, leading to temporary service interruptions or degraded performance.
No. Starlink's installation process is made to be straightforward, with step-by-step instructions provided via the Starlink app. While having some technical aptitude can be helpful, it is not a requirement to successfully install Starlink.
No. The Starlink dish is designed to automatically seek out the best satellite signals and align itself accordingly. The Starlink app assists with ensuring the dish has a clear view of the sky, but manual alignment by a professional is not necessary.
![]()
Disclosure: Hey there, folks! Just a quick heads-up: Some of the links you'll stumble upon here on my blog are Amazon Associates links. This means if you click on 'em and make a purchase, I'll earn a small commission. Don't worry, it won't cost you a penny extra. It's just their way of giving me a little hat tip for pointing you toward some cool stuff. Thanks for the support, and happy shopping!


